Linux 系统搭建 WordPress 6.0 服务
简介
一站式详细记录安装 WordPress 6.0 服务所需的全部依赖的过程,装完后可正常登录 WP 后台——写文章,传文件,装插件,换主题等,应有尽有。
准备镜像
镜像来源
https://launchpad.net/ubuntu/+cdmirrors
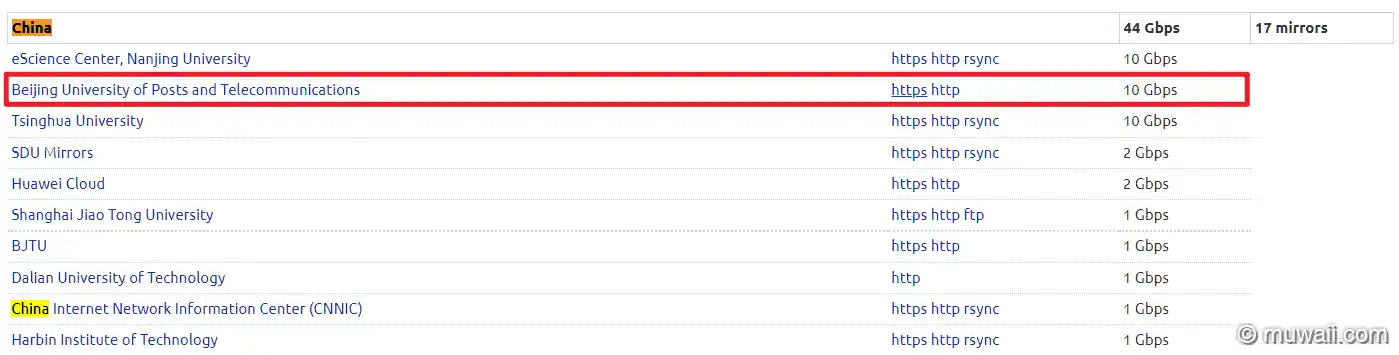
选北邮的镜像源,https 地址
https://mirrors.bupt.edu.cn/ubuntu-releases/
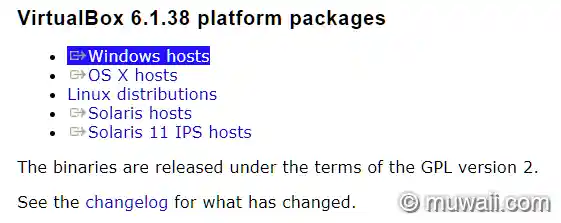
下载 VirtualBox 或 Vmware
VirtualBox 官网地址:https://www.virtualbox.org/wiki/Downloads
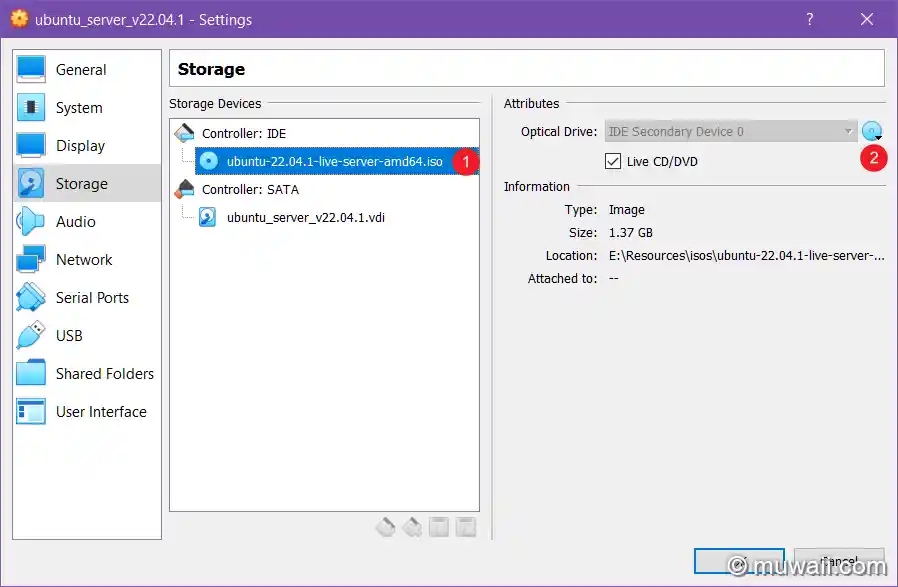
载入系统镜像到 CD
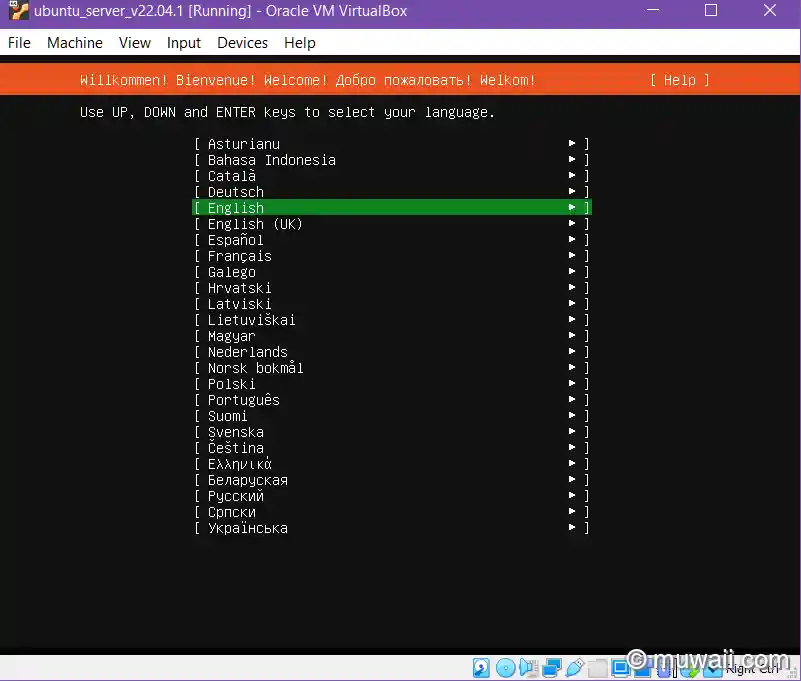
开始安装 Ubuntu
进入安装向导
设置主机名,用户名和密码。这里就不截图了。
- User:
cudaboy - Password:
hello_world - Hostname:
jammy
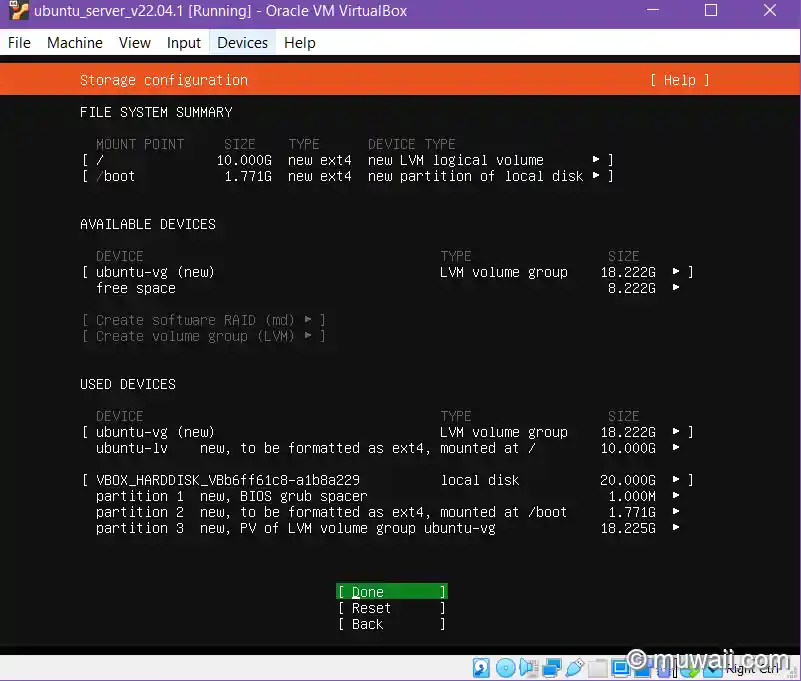
配置磁盘分区(为了简单起见,不分区)
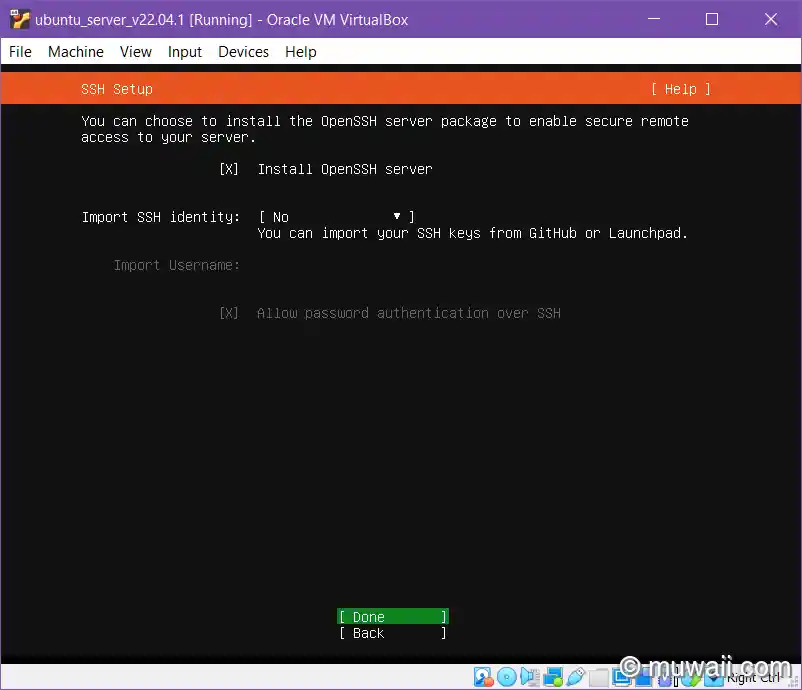
启动 OpenSSH 服务,之后才能用客户端连接进来。
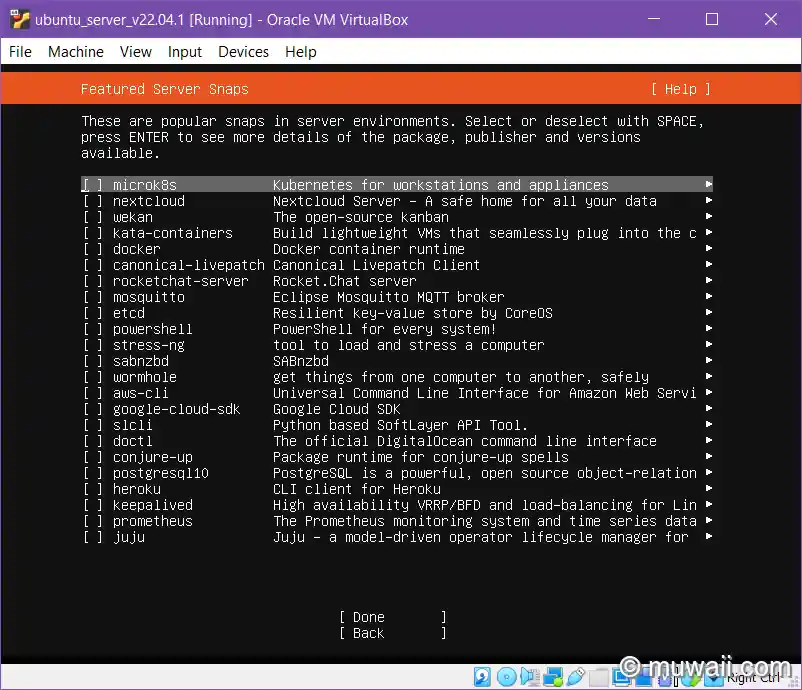
可预装热门的服务,这里先跳过。
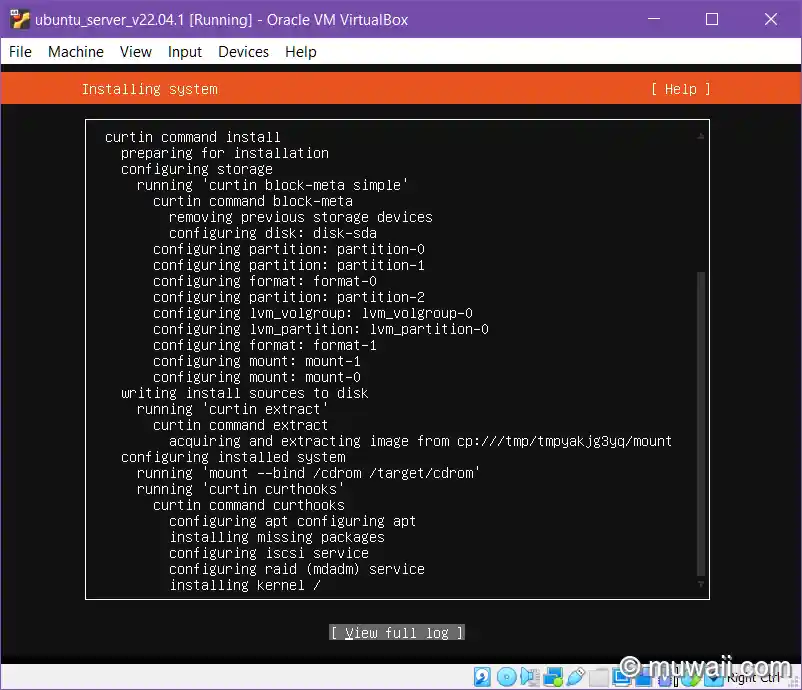
开始安装系统内核(Kernel)
系统安装完成
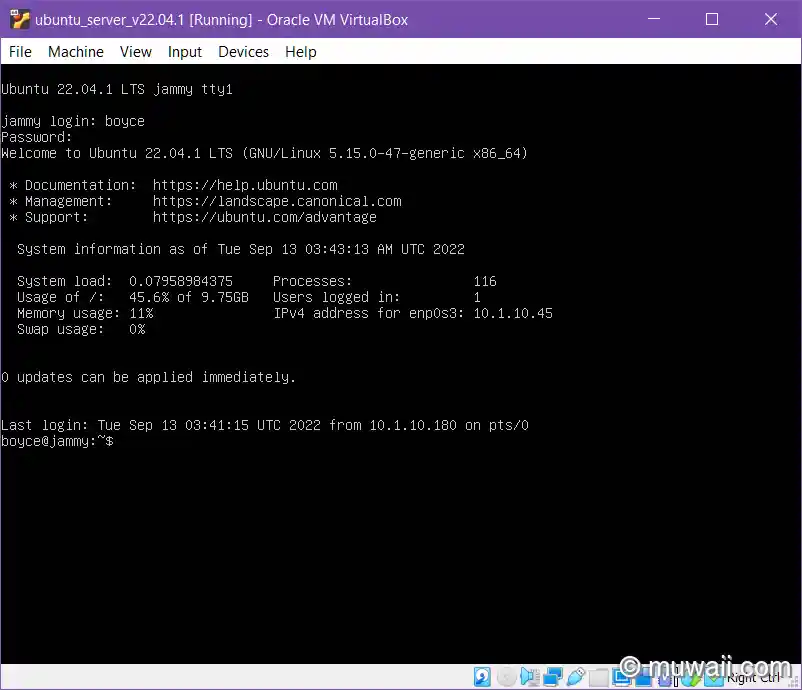

安装数据库
安装 MySQL(已被 Oracle 收购)
sudo apt install mysql-server-8.0或者用开源社区维护版本 MariaDB
curl -LsS https://downloads.mariadb.com/MariaDB/mariadb_repo_setup | sudo bash -s -- --mariadb-server-version=10.6
sudo apt install mariadb\-server mariadb\-client -y
个人推荐使用 MariaDB
查看数据库版本
$ mariadb -V
mariadb Ver 15.1 Distrib 10.6.9-MariaDB, for debian-linux-gnu (x86_64) using EditLine wrapper
检查数据库服务状态
$ systemctl status mariadb
● mariadb.service - MariaDB 10.6.9 database server
     Loaded: loaded (/lib/systemd/system/mariadb.service; enabled; vendor preset: enabled)
    Drop-In: /etc/systemd/system/mariadb.service.d
             └─migrated-from-my.cnf-settings.conf
     Active: active (running) since Tue 2022-09-13 03:48:53 UTC; 42s ago
       Docs: man:mariadbd(8)
             https://mariadb.com/kb/en/library/systemd/
    Process: 2833 ExecStartPre=/usr/bin/install -m 755 -o mysql -g root -d /var/run/mysqld (code=exited, status=0/SUCCESS)
    Process: 2834 ExecStartPre=/bin/sh -c systemctl unset-environment _WSREP_START_POSITION (code=exited, status=0/SUCCESS)
    Process: 2836 ExecStartPre=/bin/sh -c [ ! -e /usr/bin/galera_recovery ] && VAR= ||   VAR=`cd /usr/bin/..; /usr/bin/galera_recovery`; [ $? -eq 0 ]   && sy>
    Process: 2876 ExecStartPost=/bin/sh -c systemctl unset-environment _WSREP_START_POSITION (code=exited, status=0/SUCCESS)
    Process: 2878 ExecStartPost=/etc/mysql/debian-start (code=exited, status=0/SUCCESS)
   Main PID: 2865 (mariadbd)
     Status: "Taking your SQL requests now..."
      Tasks: 12 (limit: 2238)
     Memory: 61.1M
        CPU: 271ms
     CGroup: /system.slice/mariadb.service
             └─2865 /usr/sbin/mariadbd

Sep 13 03:48:53 jammy mariadbd[2865]: 2022-09-13  3:48:53 0 [Note] InnoDB: Loading buffer pool(s) from /var/lib/mysql/ib_buffer_pool
Sep 13 03:48:53 jammy mariadbd[2865]: 2022-09-13  3:48:53 0 [Warning] You need to use --log-bin to make --expire-logs-days or --binlog-expire-logs-seconds wo>
Sep 13 03:48:53 jammy mariadbd[2865]: 2022-09-13  3:48:53 0 [Note] Server socket created on IP: '127.0.0.1'.
Sep 13 03:48:53 jammy mariadbd[2865]: 2022-09-13  3:48:53 0 [Note] InnoDB: Buffer pool(s) load completed at 220913  3:48:53
Sep 13 03:48:53 jammy mariadbd[2865]: 2022-09-13  3:48:53 0 [Note] /usr/sbin/mariadbd: ready for connections.
Sep 13 03:48:53 jammy mariadbd[2865]: Version: '10.6.9-MariaDB-1:10.6.9+maria~ubu2204'  socket: '/run/mysqld/mysqld.sock'  port: 3306  mariadb.org binary dis>
Sep 13 03:48:53 jammy systemd[1]: Started MariaDB 10.6.9 database server.
Sep 13 03:48:53 jammy /etc/mysql/debian-start[2880]: Upgrading MySQL tables if necessary.
Sep 13 03:48:53 jammy /etc/mysql/debian-start[2891]: Checking for insecure root accounts.
Sep 13 03:48:53 jammy /etc/mysql/debian-start[2895]: Triggering myisam-recover for all MyISAM tables and aria-recover for all Aria tables
设置数据库服务开机自启动
$ sudo systemctl enable mariadb --now
Synchronizing state of mariadb.service with SysV service script with /lib/systemd/systemd-sysv-install.
Executing: /lib/systemd/systemd-sysv-install enable mariadb
设置 mysql 的 root 密码(推荐强度高一点密码,此密码一般不允许用于远程登录,只能本地登录)
$ sudo mysql_secure_installation
NOTE: RUNNING ALL PARTS OF THIS SCRIPT IS RECOMMENDED FOR ALL MariaDB
      SERVERS IN PRODUCTION USE!  PLEASE READ EACH STEP CAREFULLY!

In order to log into MariaDB to secure it, we'll need the current
password for the root user. If you've just installed MariaDB, and
haven't set the root password yet, you should just press enter here.

Enter current password for root (enter for none):
OK, successfully used password, moving on...

Setting the root password or using the unix_socket ensures that nobody
can log into the MariaDB root user without the proper authorisation.

You already have your root account protected, so you can safely answer 'n'.

Switch to unix_socket authentication [Y/n] Y
Enabled successfully!
Reloading privilege tables..
 ... Success!

You already have your root account protected, so you can safely answer 'n'.

Change the root password? [Y/n] Y
New password:
Re-enter new password:
Password updated successfully!
Reloading privilege tables..
 ... Success!

By default, a MariaDB installation has an anonymous user, allowing anyone
to log into MariaDB without having to have a user account created for
them.  This is intended only for testing, and to make the installation
go a bit smoother.  You should remove them before moving into a
production environment.

Remove anonymous users? [Y/n] Y
 ... Success!

Normally, root should only be allowed to connect from 'localhost'.  This
ensures that someone cannot guess at the root password from the network.

Disallow root login remotely? [Y/n] Y
 ... Success!

By default, MariaDB comes with a database named 'test' that anyone can
access.  This is also intended only for testing, and should be removed
before moving into a production environment.

Remove test database and access to it? [Y/n] Y
 - Dropping test database...
 ... Success!
 - Removing privileges on test database...
 ... Success!

Reloading the privilege tables will ensure that all changes made so far
will take effect immediately.

Reload privilege tables now? [Y/n] Y
 ... Success!

Cleaning up...

All done!  If you've completed all of the above steps, your MariaDB
installation should now be secure.

Thanks for using MariaDB!
数据库连接测试
$ mysql -u root -p
Enter password:
MariaDB [(none)]> show databases;
+--------------------+
| Database           |
+--------------------+
| information_schema |
| mysql              |
| performance_schema |
| sys                |
+--------------------+
4 rows in set (0.000 sec)
安装 PHP & FPM
Wordpress 现已经支持 PHP 8.1,比官方源的 7.2 由更多的性能提升和安全修复,推荐用新不用旧。
添加 PHP 8.1 源
添加 APT 源:
sudo add-apt-repository ppa:ondrej/php -y
sudo apt update && sudo apt upgrade
刷新 APT index 后,开始安装。
$ sudo add-apt-repository ppa:ondrej/php -y
PPA publishes dbgsym, you may need to include 'main/debug' component
Repository: 'deb https://ppa.launchpadcontent.net/ondrej/php/ubuntu/ jammy main'
Description:
Co-installable PHP versions: PHP 5.6, PHP 7.x and most requested extensions are included. Only Supported Versions of PHP ( http://php.net/supported-versions.php) for Supported Ubuntu Releases ( https://wiki.ubuntu.com/Releases) are provided. Don't ask for end-of-life PHP versions or Ubuntu release, they won't be provided.

Debian oldstable and stable packages are provided as well: https://deb.sury.org/#debian-dpa

You can get more information about the packages at https://deb.sury.org

IMPORTANT: The <foo>-backports is now required on older Ubuntu releases.

BUGS&FEATURES: This PPA now has a issue tracker:
https://deb.sury.org/#bug-reporting

CAVEATS:
1. If you are using php-gearman, you need to add ppa:ondrej/pkg-gearman
2. If you are using apache2, you are advised to add ppa:ondrej/apache2
3. If you are using nginx, you are advised to add ppa:ondrej/nginx-mainline
   or ppa:ondrej/nginx

PLEASE READ: If you like my work and want to give me a little motivation, please consider donating regularly: https://donate.sury.org/

WARNING: add-apt-repository is broken with non-UTF-8 locales, see
https://github.com/oerdnj/deb.sury.org/issues/56 for workaround:

# LC_ALL=C.UTF-8 add-apt-repository ppa:ondrej/php
More info: https://launchpad.net/~ondrej/+archive/ubuntu/php
Adding repository.
Adding deb entry to /etc/apt/sources.list.d/ondrej-ubuntu-php-jammy.list
Adding disabled deb-src entry to /etc/apt/sources.list.d/ondrej-ubuntu-php-jammy.list
Adding key to /etc/apt/trusted.gpg.d/ondrej-ubuntu-php.gpg with fingerprint 14AA40EC0831756756D7F66C4F4EA0AAE5267A6C
Hit:1 https://mirrors.aliyun.com/ubuntu jammy InRelease
Hit:2 https://mirrors.aliyun.com/ubuntu jammy-updates InRelease
Hit:3 https://mirrors.aliyun.com/ubuntu jammy-backports InRelease
Hit:4 https://mirrors.aliyun.com/ubuntu jammy-security InRelease
Get:6 https://dlm.mariadb.com/repo/mariadb-server/10.6/repo/ubuntu jammy InRelease [7,728 B]
Get:7 https://dlm.mariadb.com/repo/maxscale/latest/apt jammy InRelease [9,350 B]
Hit:5 https://downloads.mariadb.com/Tools/ubuntu jammy InRelease
Get:8 https://ppa.launchpadcontent.net/ondrej/php/ubuntu jammy InRelease [23.9 kB]
Get:9 https://ppa.launchpadcontent.net/ondrej/php/ubuntu jammy/main amd64 Packages [97.8 kB]
Get:10 https://ppa.launchpadcontent.net/ondrej/php/ubuntu jammy/main Translation-en [30.7 kB]
Fetched 169 kB in 11s (15.2 kB/s)
Reading package lists... Done
安装 PHP
执行命令:
sudo apt install php8.1-fpm php8.1-cli php8.1-common php8.1-mbstring php8.1-xmlrpc php8.1-soap php8.1-gd php8.1-xml php8.1-intl php8.1-mysql php8.1-cli php8.1-ldap php8.1-zip php8.1-curl php8.1-opcache php8.1-readline php8.1-xml php8.1-gd -y执行过程:
$ sudo apt install php8.1-fpm php8.1-cli php8.1-common php8.1-mbstring php8.1-xmlrpc php8.1-soap php8.1-gd php8.1-xml php8.1-intl php8.1-mysql php8.1-cli php8.1-ldap php8.1-zip php8.1-curl php8.1-opcache php8.1-readline php8.1-xml php8.1-gd -y
Reading package lists... Done
Building dependency tree... Done
Reading state information... Done
The following additional packages will be installed:
  bzip2 fontconfig-config fonts-dejavu-core libdeflate0 libfontconfig1 libgd3 libjbig0 libjpeg-turbo8 libjpeg8 libonig5 libtiff5 libwebp7 libxmlrpc-epi0
  libxpm4 libzip4 mailcap mime-support php-common
Suggested packages:
  bzip2-doc libgd-tools php-pear
The following NEW packages will be installed:
  bzip2 fontconfig-config fonts-dejavu-core libdeflate0 libfontconfig1 libgd3 libjbig0 libjpeg-turbo8 libjpeg8 libonig5 libtiff5 libwebp7 libxmlrpc-epi0
  libxpm4 libzip4 mailcap mime-support php-common php8.1-cli php8.1-common php8.1-curl php8.1-fpm php8.1-gd php8.1-intl php8.1-ldap php8.1-mbstring
  php8.1-mysql php8.1-opcache php8.1-readline php8.1-soap php8.1-xml php8.1-xmlrpc php8.1-zip
0 upgraded, 33 newly installed, 0 to remove and 3 not upgraded.
Need to get 8,720 kB of archives.
After this operation, 32.1 MB of additional disk space will be used.

...

Scanning processes...
Scanning candidates...
Scanning linux images...

Running kernel seems to be up-to-date.

Restarting services...
Service restarts being deferred:
 /etc/needrestart/restart.d/dbus.service
 systemctl restart networkd-dispatcher.service
 systemctl restart systemd-logind.service
 systemctl restart unattended-upgrades.service
 systemctl restart [email protected]

No containers need to be restarted.
No user sessions are running outdated binaries.
No VM guests are running outdated hypervisor (qemu) binaries on this host.
设置 PHP 开机自启动
$ sudo systemctl enable php8.1-fpm --now
Synchronizing state of php8.1-fpm.service with SysV service script with /lib/systemd/systemd-sysv-install.
Executing: /lib/systemd/systemd-sysv-install enable php8.1-fpm
$
$ sudo systemctl status php8.1-fpm.service
● php8.1-fpm.service - The PHP 8.1 FastCGI Process Manager
     Loaded: loaded (/lib/systemd/system/php8.1-fpm.service; enabled; vendor preset: enabled)
     Active: active (running) since Tue 2022-09-13 04:59:49 UTC; 3min 10s ago
       Docs: man:php-fpm8.1(8)
   Main PID: 17635 (php-fpm8.1)
     Status: "Processes active: 0, idle: 2, Requests: 0, slow: 0, Traffic: 0req/sec"
      Tasks: 3 (limit: 2238)
     Memory: 11.1M
        CPU: 48ms
     CGroup: /system.slice/php8.1-fpm.service
             ├─17635 "php-fpm: master process (/etc/php/8.1/fpm/php-fpm.conf)" "" "" "" "" "" "" "" "" "" "" "" "" "" "" "" "" "" "" "" "" "" ""
             ├─17637 "php-fpm: pool www" "" "" "" "" "" "" "" "" "" "" "" "" "" "" "" "" "" "" "" "" "" "" "" "" "" "" "" "" "" "" "" "" "" "" "" "" "" "" "">
             └─17638 "php-fpm: pool www" "" "" "" "" "" "" "" "" "" "" "" "" "" "" "" "" "" "" "" "" "" "" "" "" "" "" "" "" "" "" "" "" "" "" "" "" "" "" "">

Sep 13 04:59:49 jammy systemd[1]: php8.1-fpm.service: Deactivated successfully.
Sep 13 04:59:49 jammy systemd[1]: Stopped The PHP 8.1 FastCGI Process Manager.
Sep 13 04:59:49 jammy systemd[1]: Starting The PHP 8.1 FastCGI Process Manager...
Sep 13 04:59:49 jammy systemd[1]: Started The PHP 8.1 FastCGI Process Manager.
Php 可选配置
打开 php fpm 的配置文件,若是不熟悉 VIM 的键位,也可用 nano:
sudo vim /etc/php/8.1/fpm/php.ini
找到以下字段
##increase upload max size recommend 50 to 100mb##
## 增加上传文件的大小,默认为 2 兆,建议 50 - 100 兆
##(注意:需要和 Nginx 的大小限制是一样的,如果比 Nginx 小,Nginx 会拦截请求,不会把请求传递到PHP)
 upload_max_filesize = 100MB

##increase post max size recommend 50 to 100mb##
## 增加 POST 请求的最大大小,默认为 2 兆,建议 50 - 100 兆,一般取值要 upload_max_filesize 要大一些
 post_max_size = 100MB

## increase max execution time recommend 60 to 180##
## 设置页面脚本执行超时,默认为 30 秒,建议 60 到 180 秒
 max_execution_time = 60

## increase GET/POST/COOKIE input variables recommend 3000 to 5000##
## 允许 GET/POST 或 Cookie 中接收多少变量,默认为 1000 个,建议 3000 到 5000
max_input_vars = 5000

## increase memory limit recommend 256mb or 512mb
## MAKE SURE THIS MATCHES THE MB SETTING IN YOUR WP-CONFIG.CONF
## 增大内存限制,默认为 128 兆,建议 256兆 到 512 兆,根据你的机器硬件来设定,注意需要和 WordPress 配置文件的字段相匹配。
memory_limit = 256M
参考文档:
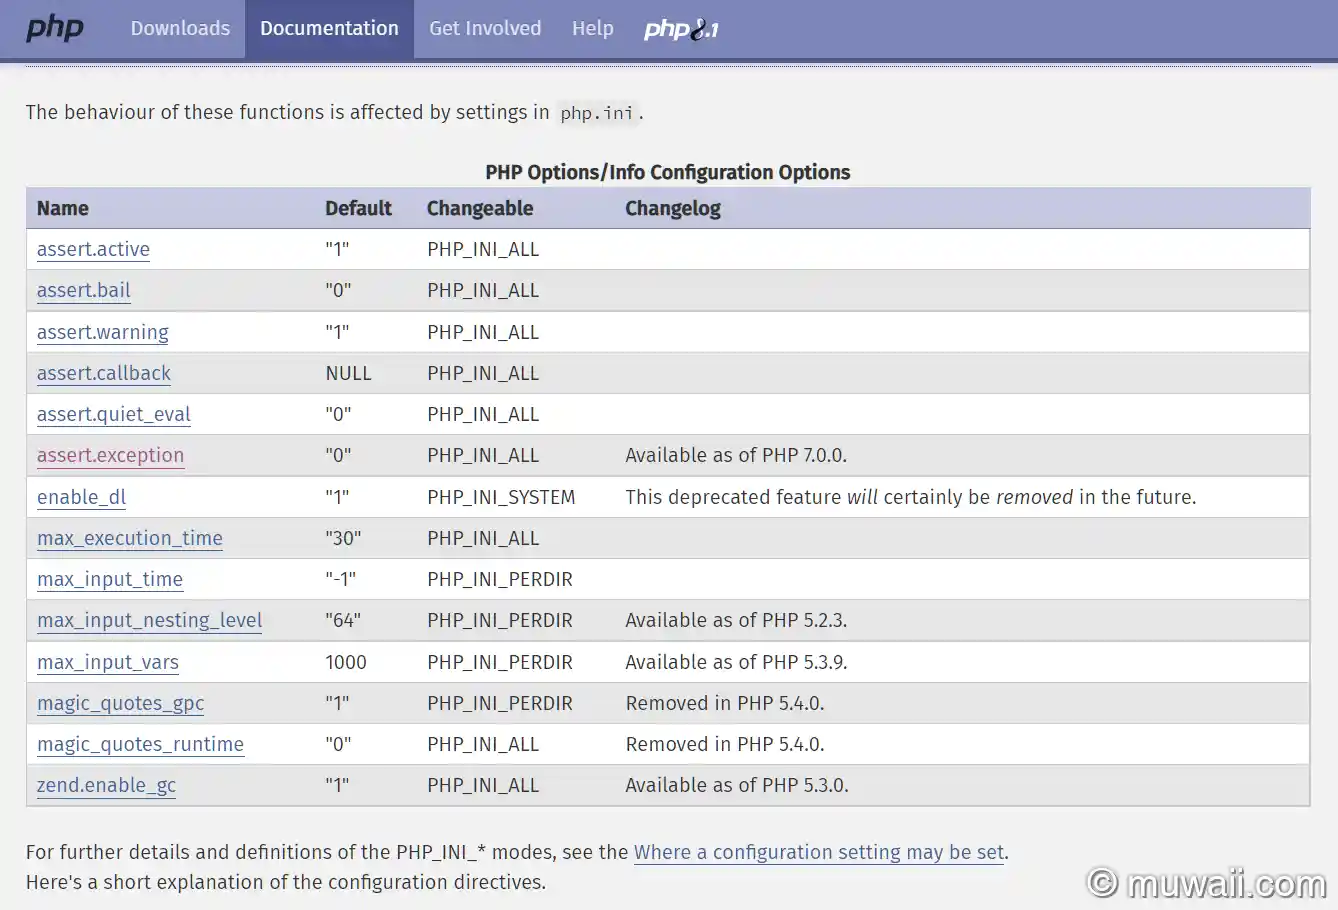
- 配置文件文档:PHP Option/Info Config
- 上传文件时常见的陷阱:common pitfalls when file upload
- Php.ini 核心配置解读:php core settings
安装 Nginx
添加源
$ sudo add-apt-repository ppa:ondrej/nginx-mainline
PPA publishes dbgsym, you may need to include 'main/debug' component
Repository: 'deb https://ppa.launchpadcontent.net/ondrej/nginx-mainline/ubuntu/ jammy main'
Description:
This branch follows latest NGINX Mainline packages compiled against latest OpenSSL for HTTP/2 and TLS 1.3 support.

BUGS&FEATURES: This PPA now has a issue tracker: https://deb.sury.org/#bug-reporting

PLEASE READ: If you like my work and want to give me a little motivation, please consider donating: https://donate.sury.org
More info: https://launchpad.net/~ondrej/+archive/ubuntu/nginx-mainline
Adding repository.
Press [ENTER] to continue or Ctrl-c to cancel.
Adding deb entry to /etc/apt/sources.list.d/ondrej-ubuntu-nginx-mainline-jammy.list
Adding disabled deb-src entry to /etc/apt/sources.list.d/ondrej-ubuntu-nginx-mainline-jammy.list
Adding key to /etc/apt/trusted.gpg.d/ondrej-ubuntu-nginx-mainline.gpg with fingerprint 14AA40EC0831756756D7F66C4F4EA0AAE5267A6C
Hit:1 https://mirrors.aliyun.com/ubuntu jammy InRelease
Hit:2 https://mirrors.aliyun.com/ubuntu jammy-updates InRelease
Hit:3 https://mirrors.aliyun.com/ubuntu jammy-backports InRelease
Hit:4 https://mirrors.aliyun.com/ubuntu jammy-security InRelease
Get:5 https://dlm.mariadb.com/repo/mariadb-server/10.6/repo/ubuntu jammy InRelease [7,728 B]
Get:6 https://dlm.mariadb.com/repo/maxscale/latest/apt jammy InRelease [9,350 B]
Get:8 https://ppa.launchpadcontent.net/ondrej/nginx-mainline/ubuntu jammy InRelease [23.8 kB]
Hit:7 https://downloads.mariadb.com/Tools/ubuntu jammy InRelease
Hit:9 https://ppa.launchpadcontent.net/ondrej/php/ubuntu jammy InRelease
Get:10 https://ppa.launchpadcontent.net/ondrej/nginx-mainline/ubuntu jammy/main amd64 Packages [5,224 B]
Get:11 https://ppa.launchpadcontent.net/ondrej/nginx-mainline/ubuntu jammy/main Translation-en [5,660 B]
Fetched 51.8 kB in 12s (4,389 B/s)
Reading package lists... Done
安装 Nginx 服务
$ sudo apt install nginx-core nginx-common nginx nginx-full
Reading package lists... Done
Building dependency tree... Done
Reading state information... Done
The following additional packages will be installed:
  geoip-database libgeoip1 libnginx-mod-brotli libnginx-mod-http-auth-pam libnginx-mod-http-dav-ext libnginx-mod-http-echo libnginx-mod-http-geoip
  libnginx-mod-http-geoip2 libnginx-mod-http-image-filter libnginx-mod-http-subs-filter libnginx-mod-http-upstream-fair libnginx-mod-http-xslt-filter
  libnginx-mod-mail libnginx-mod-ssl-ct libnginx-mod-stream libnginx-mod-stream-geoip libnginx-mod-stream-geoip2
Suggested packages:
  geoip-bin fcgiwrap nginx-doc ssl-cert
The following NEW packages will be installed:
  geoip-database libgeoip1 libnginx-mod-brotli libnginx-mod-http-auth-pam libnginx-mod-http-dav-ext libnginx-mod-http-echo libnginx-mod-http-geoip
  libnginx-mod-http-geoip2 libnginx-mod-http-image-filter libnginx-mod-http-subs-filter libnginx-mod-http-upstream-fair libnginx-mod-http-xslt-filter
  libnginx-mod-mail libnginx-mod-ssl-ct libnginx-mod-stream libnginx-mod-stream-geoip libnginx-mod-stream-geoip2 nginx nginx-common nginx-core nginx-full
0 upgraded, 21 newly installed, 0 to remove and 3 not upgraded.
Need to get 4,412 kB of archives.
After this operation, 13.6 MB of additional disk space will be used.
Do you want to continue? [Y/n] Y
启用压缩
修改默认配置,在 http {} 部分,添加如下配置开启 brotli 压缩算法:
brotli on;
brotli_comp_level 6;
brotli_static on;
brotli_types application/atom+xml application/javascript application/json application/rss+xml
   application/vnd.ms-fontobject application/x-font-opentype application/x-font-truetype
   application/x-font-ttf application/x-javascript application/xhtml+xml application/xml
   font/eot font/opentype font/otf font/truetype image/svg+xml image/vnd.microsoft.icon
   image/x-icon image/x-win-bitmap text/css text/javascript text/plain text/xml;
修改完,检查配置是否有效
$ sudo nginx -t
nginx: the configuration file /etc/nginx/nginx.conf syntax is ok
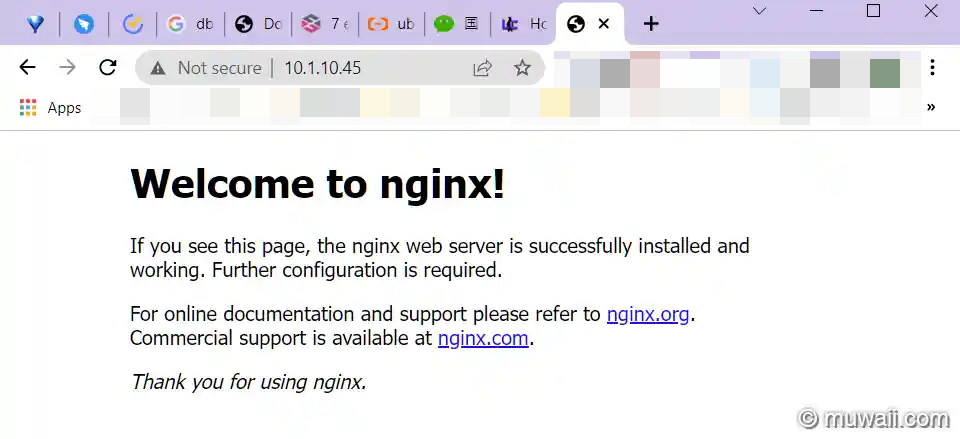
nginx: configuration file /etc/nginx/nginx.conf test is successful确认没有问题后,重启 Nginx 服务
打开浏览器,确认服务器 IP 可以访问(比如 10.1.10.45:80)80端口是默认的,可以缺省不填写。
设置开机自启动
$ sudo systemctl enable nginx --now
Synchronizing state of nginx.service with SysV service script with /lib/systemd/systemd-sysv-install.
Executing: /lib/systemd/systemd-sysv-install enable nginx
Created symlink /etc/systemd/system/multi-user.target.wants/nginx.service → /lib/systemd/system/nginx.service.
查看 Nginx 状态
$ sudo systemctl status nginx
● nginx.service - A high performance web server and a reverse proxy server
     Loaded: loaded (/lib/systemd/system/nginx.service; enabled; vendor preset: enabled)
     Active: active (running) since Tue 2022-09-13 05:16:08 UTC; 2s ago
       Docs: man:nginx(8)
    Process: 2058 ExecStartPre=/usr/sbin/nginx -t -q -g daemon on; master_process on; (code=exited, status=0/SUCCESS)
    Process: 2060 ExecStart=/usr/sbin/nginx -g daemon on; master_process on; (code=exited, status=0/SUCCESS)
   Main PID: 2061 (nginx)
      Tasks: 2 (limit: 2238)
     Memory: 2.8M
        CPU: 19ms
     CGroup: /system.slice/nginx.service
             ├─2061 "nginx: master process /usr/sbin/nginx -g daemon on; master_process on;"
             └─2062 "nginx: worker process" "" "" "" "" "" "" "" "" "" "" "" "" "" "" "" "" "" "" "" "" "" "" "" "" "" "" ""

Sep 13 05:16:08 jammy systemd[1]: nginx.service: Deactivated successfully.
Sep 13 05:16:08 jammy systemd[1]: Stopped A high performance web server and a reverse proxy server.
Sep 13 05:16:08 jammy systemd[1]: Starting A high performance web server and a reverse proxy server...
Sep 13 05:16:08 jammy systemd[1]: nginx.service: Failed to parse PID from file /run/nginx.pid: Invalid argument
Sep 13 05:16:08 jammy systemd[1]: Started A high performance web server and a reverse proxy server.
发现无法解析 PID,这时 Systemd 和 nginx 的兼容问题导致。可通过修改配置文件,让 Nginx 延迟 0.1 秒启动解决
添加 ExecStartPost=/bin/sleep 0.1 到 [Service] 后面。
sudo cat /lib/systemd/system/nginx.service
# Stop dance for nginx
# =======================
#
# ExecStop sends SIGQUIT (graceful stop) to the nginx process.
# If, after 5s (--retry QUIT/5) nginx is still running, systemd takes control
# and sends SIGTERM (fast shutdown) to the main process.
# After another 5s (TimeoutStopSec=5), and if nginx is alive, systemd sends
# SIGKILL to all the remaining processes in the process group (KillMode=mixed).
#
# nginx signals reference doc:
# http://nginx.org/en/docs/control.html
#
[Unit]
Description=A high performance web server and a reverse proxy server
Documentation=man:nginx(8)
After=network.target nss-lookup.target

[Service]
Type=forking
PIDFile=/run/nginx.pid
ExecStartPre=/usr/sbin/nginx -t -q -g 'daemon on; master_process on;'
ExecStartPost=/bin/sleep 0.1
ExecStart=/usr/sbin/nginx -g 'daemon on; master_process on;'
ExecReload=/usr/sbin/nginx -g 'daemon on; master_process on;' -s reload
ExecStop=-/sbin/start-stop-daemon --quiet --stop --retry QUIT/5 --pidfile /run/nginx.pid
TimeoutStopSec=5
KillMode=mixed

[Install]
WantedBy=multi-user.target
重载 systemd daemon,即重新读取启动配置
$ sudo systemctl daemon-reload此时再重启 nginx,看服务状态,这时可以正常解析 pid 了
$ sudo systemctl restart nginx
$ sudo systemctl status nginx
● nginx.service - A high performance web server and a reverse proxy server
     Loaded: loaded (/lib/systemd/system/nginx.service; enabled; vendor preset: enabled)
     Active: active (running) since Tue 2022-09-13 05:21:26 UTC; 3s ago
       Docs: man:nginx(8)
    Process: 2404 ExecStartPre=/usr/sbin/nginx -t -q -g daemon on; master_process on; (code=exited, status=0/SUCCESS)
    Process: 2405 ExecStart=/usr/sbin/nginx -g daemon on; master_process on; (code=exited, status=0/SUCCESS)
    Process: 2407 ExecStartPost=/bin/sleep 0.1 (code=exited, status=0/SUCCESS)
   Main PID: 2406 (nginx)
      Tasks: 2 (limit: 2238)
     Memory: 2.8M
        CPU: 21ms
     CGroup: /system.slice/nginx.service
             ├─2406 "nginx: master process /usr/sbin/nginx -g daemon on; master_process on;"
             └─2408 "nginx: worker process" "" "" "" "" "" "" "" "" "" "" "" "" "" "" "" "" "" "" "" "" "" "" "" "" "" "" ""

Sep 13 05:21:26 jammy systemd[1]: nginx.service: Deactivated successfully.
Sep 13 05:21:26 jammy systemd[1]: Stopped A high performance web server and a reverse proxy server.
Sep 13 05:21:26 jammy systemd[1]: Starting A high performance web server and a reverse proxy server...
Sep 13 05:21:26 jammy systemd[1]: Started A high performance web server and a reverse proxy server.
可选配置防火墙
安装防火墙
sudo apt install ufw -y开启终端连接 SSH(默认是22 端口),网站服务端口(80,443端口)
$ sudo ufw app list
Available applications:
  Nginx Full
  Nginx HTTP
  Nginx HTTPS
  OpenSSH
$ sudo ufw allow "Nginx Full"
Rules updated
Rules updated (v6)
$ sudo ufw allow "OpenSSH"
Rules updated
Rules updated (v6)
$ sudo ufw status verbose
Status: inactive
$ sudo ufw enable
Command may disrupt existing ssh connections. Proceed with operation (y|n)? Y
Firewall is active and enabled on system startup
$ sudo ufw status verbose
Status: active
Logging: on (low)
Default: deny (incoming), allow (outgoing), disabled (routed)
New profiles: skip

To                         Action      From
--                         ------      ----
80,443/tcp (Nginx Full)    ALLOW IN    Anywhere
22/tcp (OpenSSH)           ALLOW IN    Anywhere
80,443/tcp (Nginx Full (v6)) ALLOW IN    Anywhere (v6)
22/tcp (OpenSSH (v6))      ALLOW IN    Anywhere (v6)
安装 Wordpress
获取源代码
下载最新版本 wp
wget -cv https://wordpress.org/latest.zip -O wordpress_latest.zip创建待解压的目录
sudo mkdir -p /var/www/html/使用 unzip 命令解压(如提示没有该包,用 sudo apt install unzip 进行安装)
$ sudo unzip wordpress_latest.zip -d /var/www/html/修改 WP 根目录权限
修改目录的所有人(Owner)
sudo chown -R www-data:www-data /var/www/html/wordpress/修改目录的权限(仅修改目录,文件不修改)
sudo find /var/www/html/wordpress -type d -exec chmod 755 {} \;修改文件的权限(文件的拥有人可以读取和写入,而其他人只读)
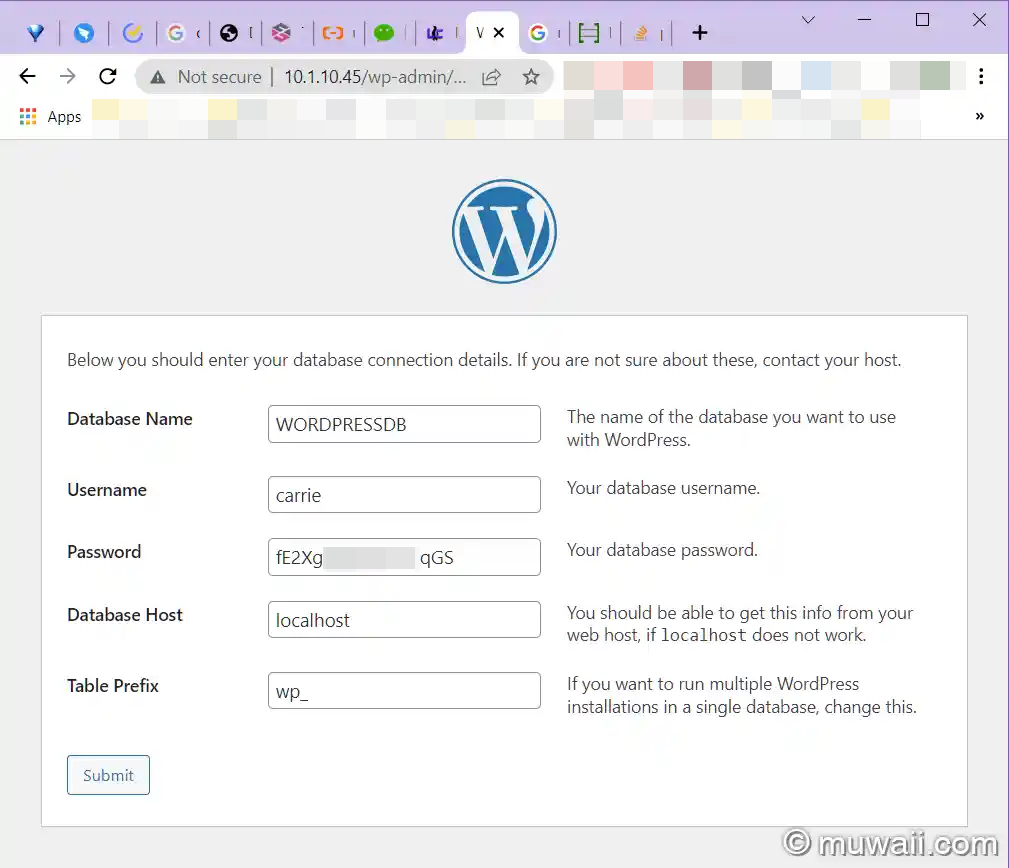
sudo find /var/www/html/wordpress -type f -exec chmod 644 {} \;为 WP 创建数据库
| 数据库名 | WORDPRESSDB |
|---|---|
| 用户名 | carrie |
| 密码 | fE2***doqGS |
$ sudo mariadb -u root -p
Enter password:
MariaDB [(none)]> CREATE DATABASE WORDPRESSDB;
Query OK, 1 row affected (0.000 sec)

MariaDB [(none)]>
MariaDB [(none)]> CREATE USER 'carrie'@localhost IDENTIFIED BY 'fE2*******doqGS';
Query OK, 0 rows affected (0.017 sec)
MariaDB [(none)]>
MariaDB [(none)]> GRANT ALL PRIVILEGES ON WORDPRESSDB.* TO carrie@localhost IDENTIFIED BY 'fE2XgOM5n4GdoqGS';
Query OK, 0 rows affected (0.005 sec)

MariaDB [(none)]> FLUSH PRIVILEGES;
Query OK, 0 rows affected (0.000 sec)

MariaDB [(none)]> EXIT
Bye
为 WP 配置 Nginx
需要注意 http://www.example.com 和 example.com 要改成你自己域名,或服务器IP。不可照抄。
$ sudo cat /etc/nginx/sites-available/my_wp.conf
server {

  listen 80;
  listen [::]:80;
  server_name www.example.com example.com;

  root /var/www/html/wordpress;

  index index.php index.html index.htm index.nginx-debian.html;

  location / {
  try_files $uri $uri/ /index.php?$args;
 }

  location ~* /wp-sitemap.*\.xml {
    try_files $uri $uri/ /index.php$is_args$args;
  }

  client_max_body_size 100M;

  location ~ \.php$ {
    fastcgi_pass unix:/run/php/php8.1-fpm.sock;
    fastcgi_param SCRIPT_FILENAME $document_root$fastcgi_script_name;
    include fastcgi_params;
    include snippets/fastcgi-php.conf;
    fastcgi_buffer_size 128k;
    fastcgi_buffers 4 128k;
    fastcgi_intercept_errors on;
  }

   gzip on;
   gzip_comp_level 6;
   gzip_min_length 1000;
   gzip_proxied any;
   gzip_disable "msie6";
   gzip_types
     application/atom+xml
     application/geo+json
     application/javascript
     application/x-javascript
     application/json
     application/ld+json
     application/manifest+json
     application/rdf+xml
     application/rss+xml
     application/xhtml+xml
     application/xml
     font/eot
     font/otf
     font/ttf
     image/svg+xml
     text/css
     text/javascript
     text/plain
     text/xml;

  # assets, media
  location ~* \.(?:css(\.map)?|js(\.map)?|jpe?g|png|gif|ico|cur|heic|webp|tiff?|mp3|m4a|aac|ogg|midi?|wav|mp4|mov|webm|mpe?g|avi|ogv|flv|wmv)$ {
      expires    90d;
      access_log off;
  }

  # svg, fonts
  location ~* \.(?:svgz?|ttf|ttc|otf|eot|woff2?)$ {
      add_header Access-Control-Allow-Origin "*";
      expires    90d;
      access_log off;
  }

  location ~ /\.ht {
      access_log off;
      log_not_found off;
      deny all;
  }
}
创建符号连接
上面的配置说明了哪些站点配置是可用的(available),而具体哪些是启用的(enabled)则未指定,我们通过符号连接来配置。
/etc/nginx/sites-enabled$ sudo ln -sfn ../sites-available/my_wp.conf my_wp.conf
/etc/nginx/sites-enabled$
/etc/nginx/sites-enabled$ ls -al
total 8
drwxr-xr-x 2 root root 4096 Sep 13 05:49 .
drwxr-xr-x 8 root root 4096 Sep 13 05:12 ..
lrwxrwxrwx 1 root root   34 Sep 13 05:09 default -> /etc/nginx/sites-available/default
lrwxrwxrwx 1 root root   29 Sep 13 05:49 my_wp.conf -> ../sites-available/my_wp.conf
检查 nginx 配置
$ sudo nginx -t
nginx: the configuration file /etc/nginx/nginx.conf syntax is ok
nginx: configuration file /etc/nginx/nginx.conf test is successful
确认配置没问题后,在 /etc/nginx/sites-enabled/ 删除 default 配置
sudo rm /etc/nginx/sites-enabled/default重启/重载 nginx 配置
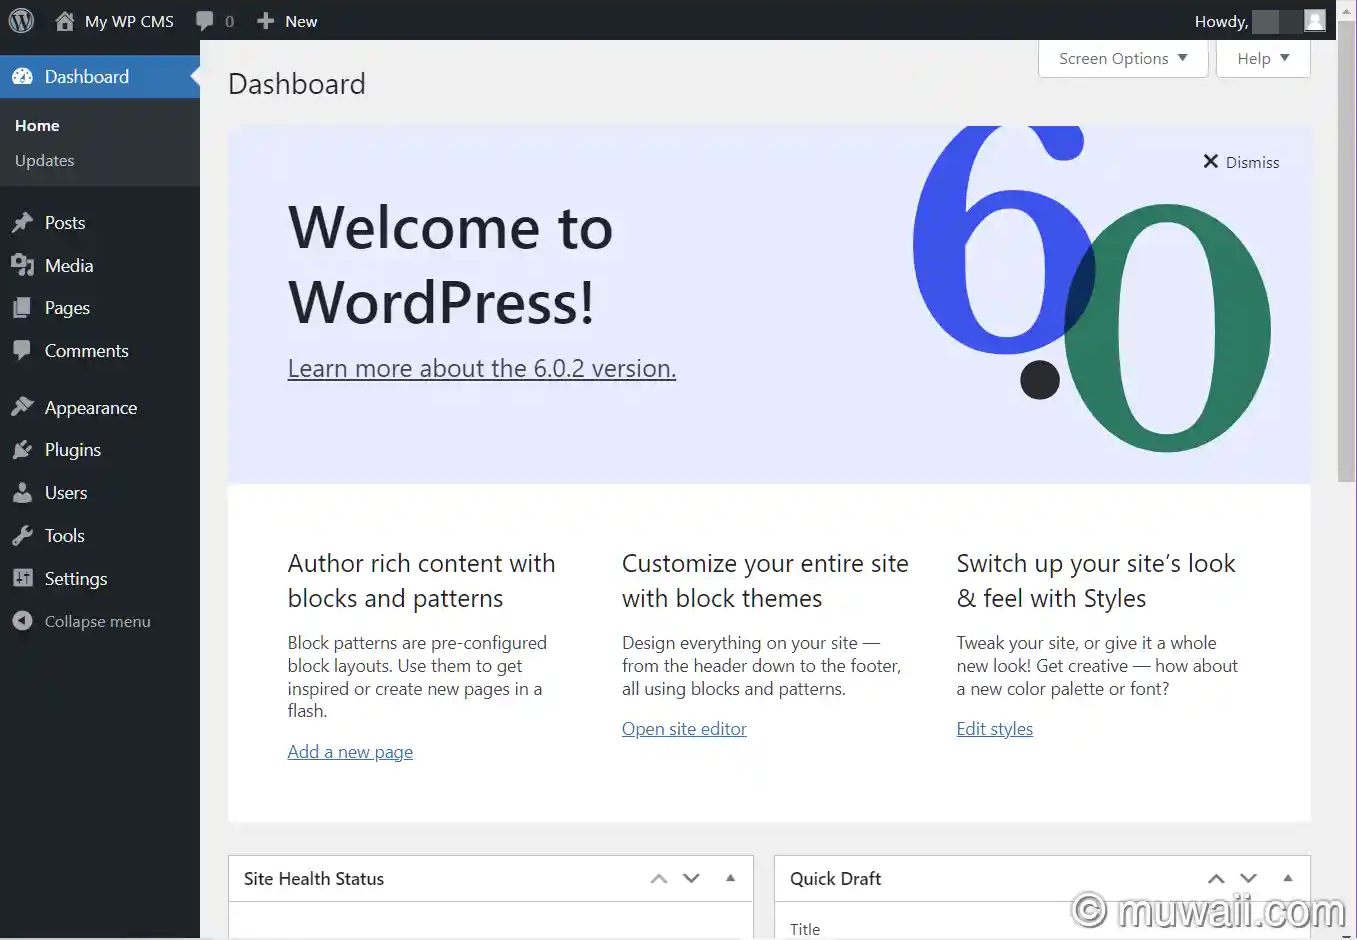
sudo systemctl reload nginx初始化 WordPress
此时再打开浏览访问,可看到经典 WordPress 初始化界面
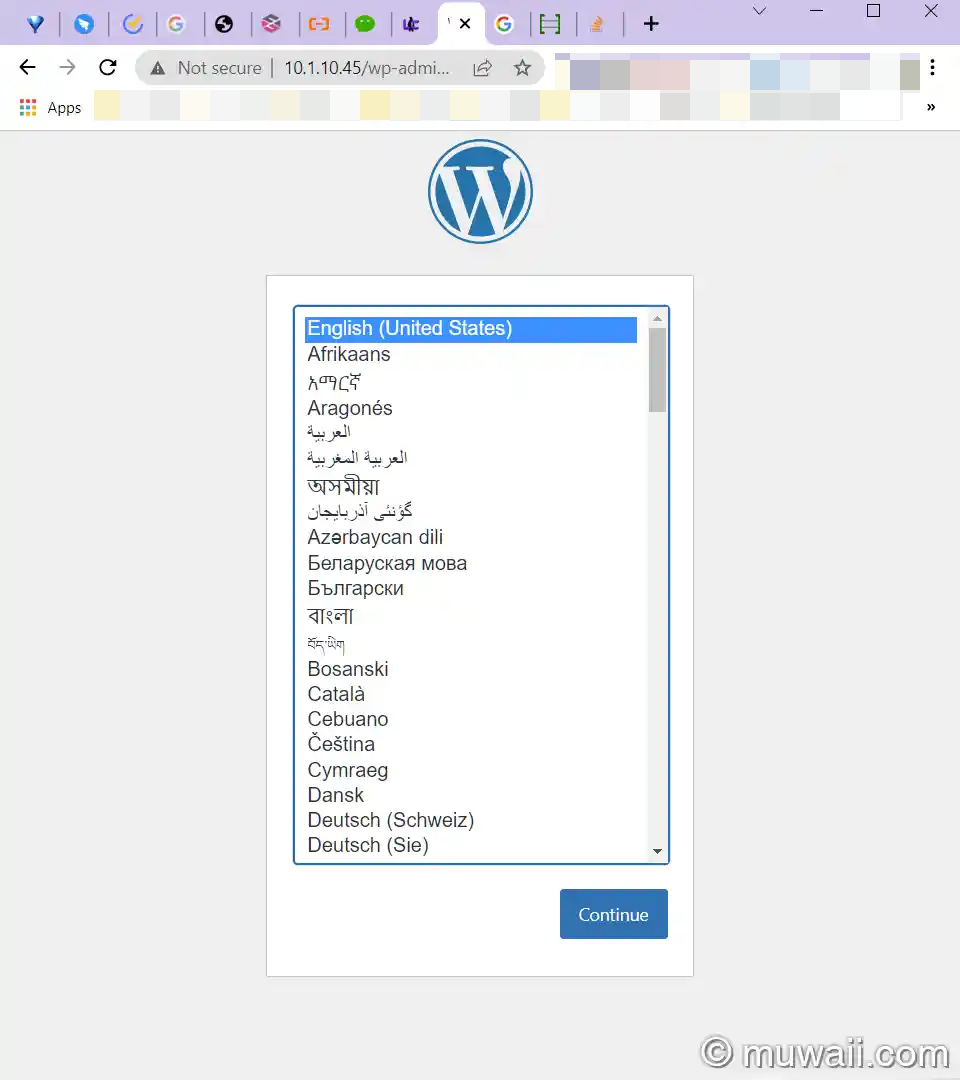
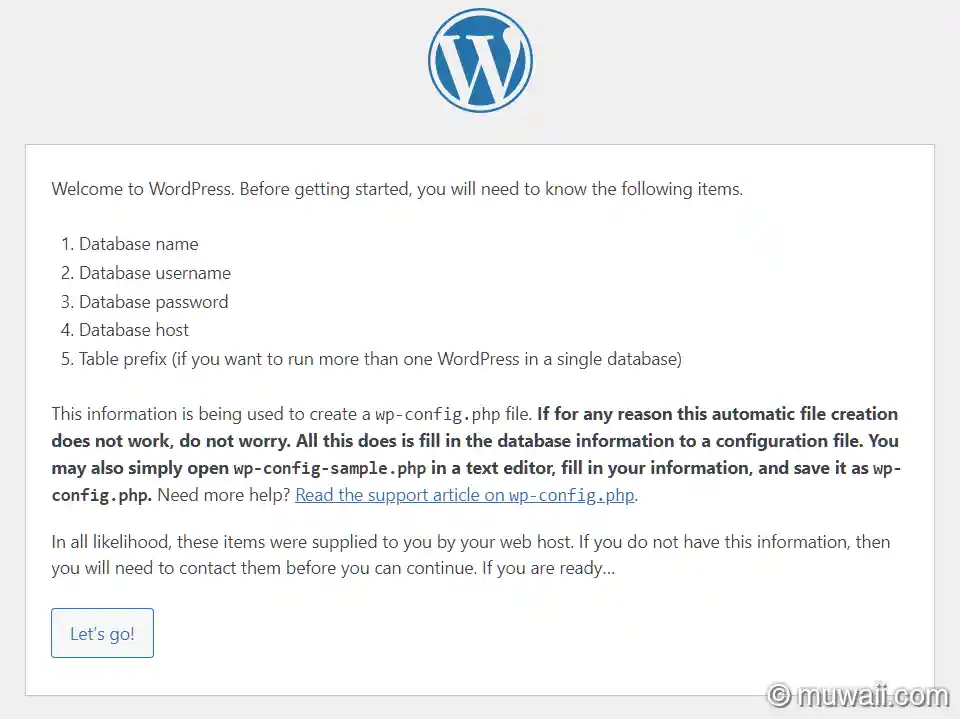
根据之前的数据库名称,用户名和密码,如实填写即可。
接着配置一下站点信息和后台登录账户。
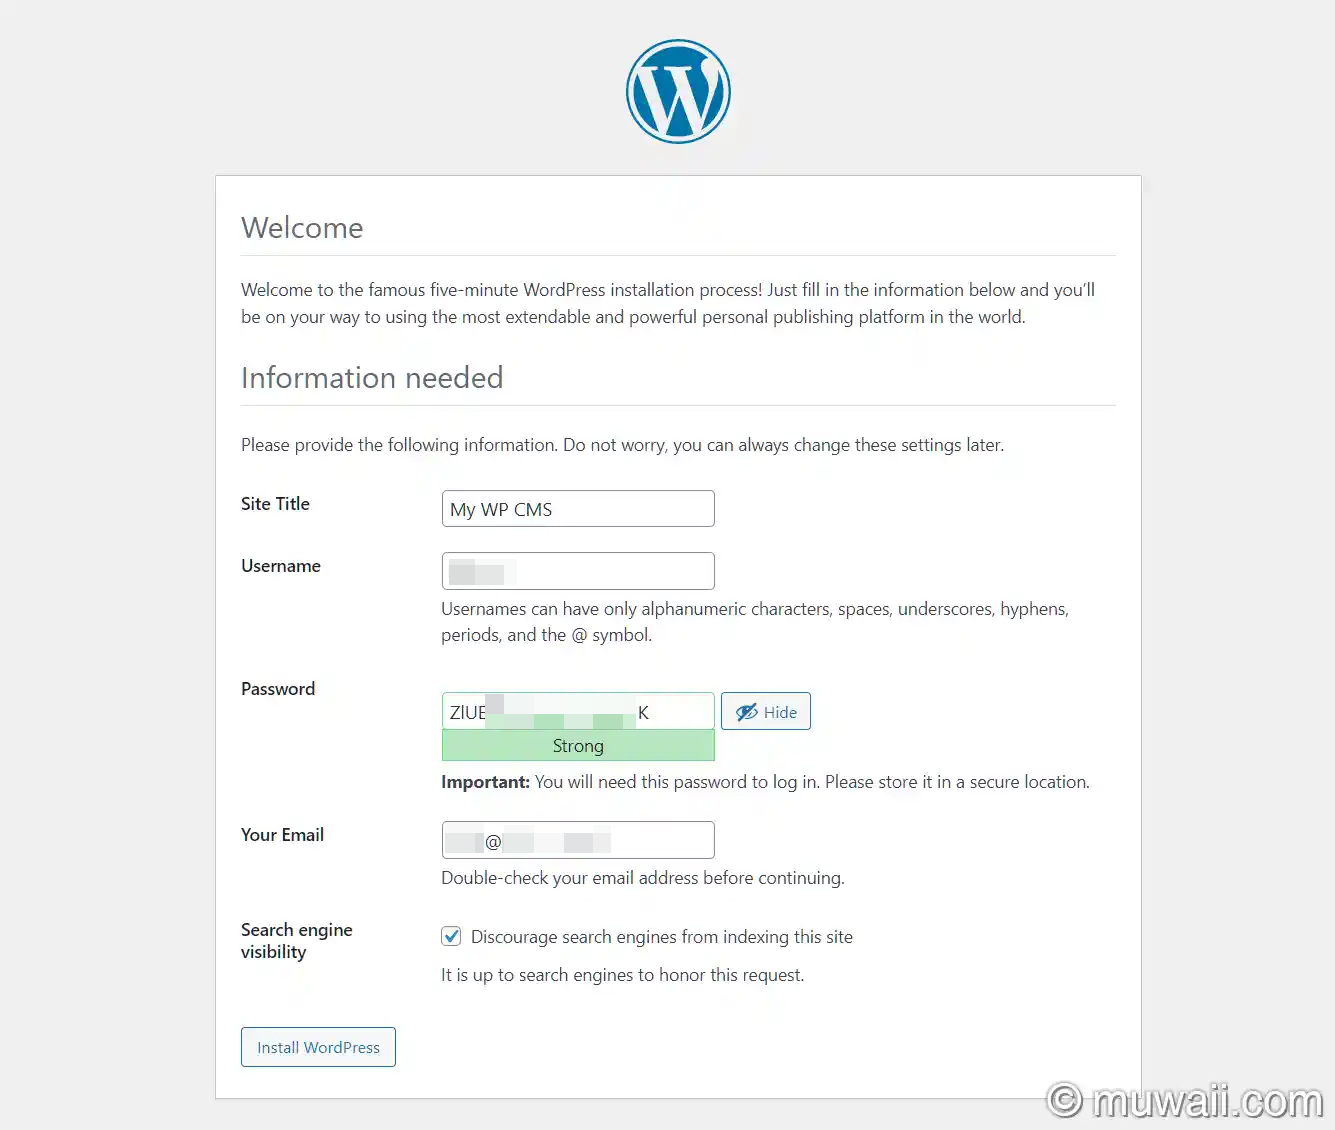
如果网站是公网可见,建议取消勾选 Discourage Search Engine from indexing this site,这样搜索引擎才能检索并收录你的站点。

只差临门一脚,点击 Login

登录 WP 后台
大功告成
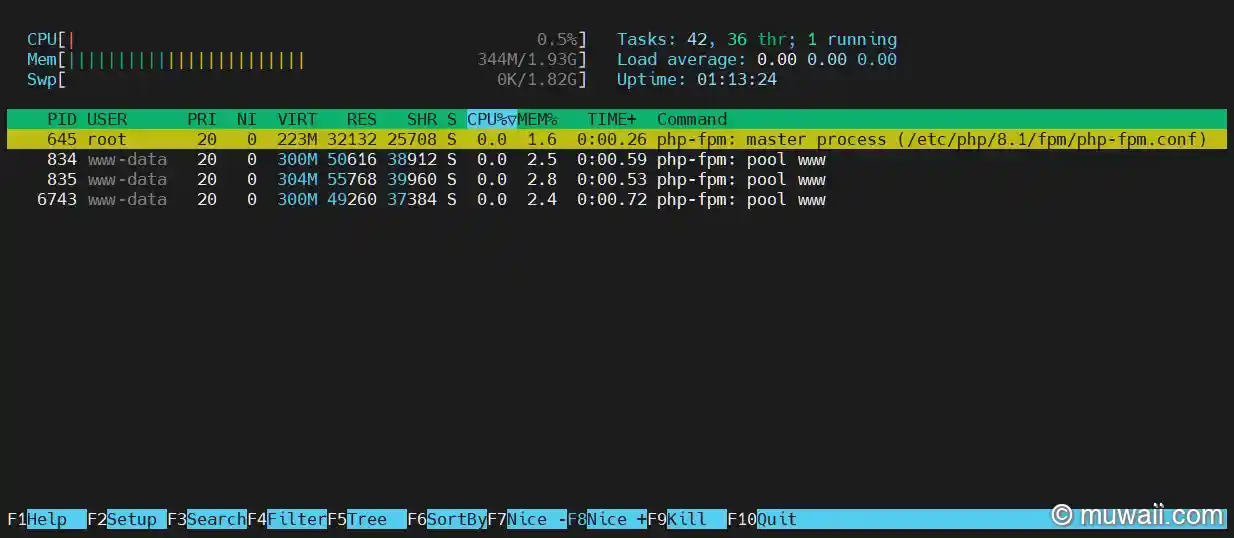
总结
最后看一眼资源占用情况
内存占用
$ sudo free -m -h
               total        used        free      shared  buff/cache   available
Mem:           1.9Gi       283Mi       1.1Gi        25Mi       564Mi       1.5Gi
Swap:          1.8Gi          0B       1.8Gi
CPU占用
磁盘占用
$ df -h -t ext4
Filesystem                         Size  Used Avail Use% Mounted on
/dev/mapper/ubuntu--vg-ubuntu--lv  9.8G  5.0G  4.4G  54% /
/dev/sda2                          1.8G  127M  1.5G   8% /boot
$
$ du --max-depth 1 -h /var/www/html/wordpress/
14M     /var/www/html/wordpress/wp-content
9.7M    /var/www/html/wordpress/wp-admin
44M     /var/www/html/wordpress/wp-includes
68M     /var/www/html/wordpress/
小结
因此在选购云主机时,1G 内存单核 CPU 的服务器就够用了,磁盘的话,若不存大量的图片 10 G 也是足够了。
选择突发性能实例的话,一年的价格最省的话,在 2-300 之间(域名需要另外购买)。
提示
突发性能实例产品特性确认
突发性能实例(Burstable instance),是一种应对平时 CPU 负载不高,仅偶发高负载需求场景的实例类型。与普通实例相比,此实例价格大幅降低,适合低负载业务场景下使用。与普通的实例特点不同,每台 突发性能实例 在 vCPU 数量与 GiB 内存这一基本配置属性基础上,还有一个关键属性:平均基准 CPU 计算性能(基线性能),代表该实例的平均性能期望。
如日常性能低于基线性能时,则实例以 CPU 积分的方式积累性能,供后续超过基线能力使用,积攒速度取决于实际负载低于基准性能;如偶发需求高于基线性能 (最高可达 100%),则实例消耗所积攒的 CPU 积分,消耗速度取决于实际负载高于基准性能。平均基线性能代表该实例每小时可获分配的 CPU 积分数值最大值。在 CPU 积分消耗为 0 时,实例性能将被控制在基准 CPU 计算性能(10% 或 15%)附近。具体积分积累、分配策略,请参见 帮助文档
突发性能实例适用于平时不持续高压力使用 CPU、偶尔需要提高计算性能完成工作负载的场景,例如:轻量级的 Web 服务器、开发、测试环境以及中低性能数据库等。
